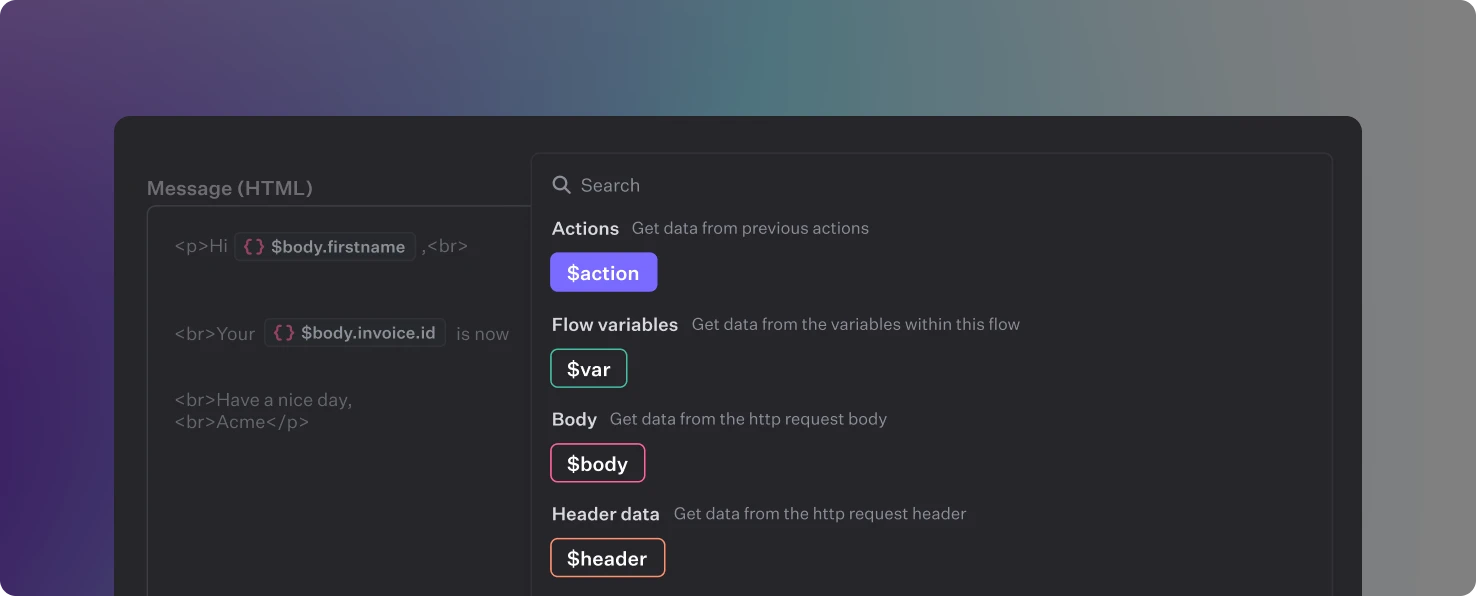
Accessing data
In Fastgen, each action block has a predefined data structure that specifies the format and structure of the data that the action block generates. This data structure can be found in the documentation for each action. To access the outputs generated by other action blocks, Fastgen provides different options:From actions
If you want to access data from any other action block, regardless of whether it’s the previous one or not, you can use the following syntax:{{$action['action-name']}}, where “action-name” is the name of the action block you want to access the outputs from. For example, if you want to access the outputs of an action block named “Send Email”, you can use {{$action['send-email']}}.
One exception are variables you define within the Variable Action. To access a defined variable you use {{$var['action-name']}}. So if you define a variable in a variable action block and name it “Follow up link”, you can access it using {{$var['follow-up-link']}}.
Note how the action key within the variable is the lowercase form of the
action name, with all spaces and special characters replaced by hyphens
-. If the action key contains no special characters and does not have a leading number you can also use the non bracket syntax like {{$action.greeting}} similar to how javascript or python handles this.From API requests (API-Builder only)
If you want to access data from requests to the API itself, such as the request body, header, query params, etc., you can use the{{$body.KEY}}, {{$query.KEY}}, {{$path.KEY}}, and {{$header.KEY}} syntax, where “KEY” is the relevant and case-sensitive key in the request’s data structure. For example, to access the “name” field from the request body, users can use {{$body.name}}.
$bodyRaw
$bodyRaw represents the fully unaltered version of the request body, preserving any whitespace differences that might exist compared to $body. While the content remains identical between $bodyRaw and $body, the latter is generally preferred for most use cases due to its normalized formatting.
However, there are specific scenarios where working with the unmodified request body is crucial. For instance, if you need to verify a request signature to detect any potential tampering (such as a man-in-the-middle attack), $bodyRaw becomes essential. In these cases, you would use $bodyRaw to calculate your version of the request signature and compare it against the signature typically provided in the request headers.
$file
API Routes support file uploads of up to 10 MB, with all uploaded files accessible via{{$file.NAME}}.
When in debug mode, files appear as a text summary displaying key information, such as: <<File: my-test-file.jpeg, Size: 239.1 KiB>>. This approach keeps the Action Log and Action Output views clean and manageable by hiding the full file content initially.
To access the underlying properties of a file, you can use the following attributes: {{$file.NAME.name}}, {{$file.NAME.size}}, {{$file.NAME.content}}, and {{$file.NAME.content_type}}.
$user
In case the route was called by an authenticated user of the project, you’ll have access to{{$user.id}}, {{$user.email}}, {{$user.emailVerified}}, and {{$user.roles}}.
Using these variable syntaxes, you can easily access data generated by other action blocks and use it in subsequent action blocks in your workflow. This feature allows for a high degree of flexibility and control over the data flow within your workflows.
From events (Event workflows only)
If you create an Event based workflow and want to access data from the API/workflow which emitted the event, you can store parameters within the JSON of the Create Event and then access it through{{$param.KEY}}.
Indexing variables
One crucial feature of variables is their ability to support indexing, which allows you to access specific elements within a given list. To index a variable, you can use the following syntax:{{$variableName[index]}}. For example, if the request body has the key myList, which is an array of values, you can access the third element of the array like this: {{$body.myList[2]}}.
It’s important to note that indexing in programming is typically zero-indexed,
which means that the first element in an array has an index of 0, the second
element has an index of 1, and so on
{{$body.myList[$query.myIndex]}} to use the number from the query parameter myIndex to get that specific item from myList.
Lastly, it’s worth noting that indexes can also be negative. In this case, -1 represents the last element in an array, -2 represents the second-to-last element, and so on. Accessing the last element would then look like this: {{$body.myList[-1]}}.
Setting fallback values
In Fastgen, you can define fallback values for variables to ensure that a default value is used if the variable is not set or does not have a value. Fallback values provide a way to handle instances where the desired value is not available or cannot be retrieved. To define a fallback value for a variable, you can use the fallback function either like this:{{fallback($action['action-name'], 'Fallback value'}} or using the pipe operator like this {{$action['action-name'] | fallback(3.14)}}.

