Multipart upload
Multipart upload allows you to upload a single object as a set of parts. Each part is a contiguous portion of the object’s data. You can upload these object parts independently and in any order. After all parts of your object are uploaded, the multipart upload assembly process puts all the object parts together into a single object.Benefits of Multipart Upload
- Efficient: You can upload large files more quickly and efficiently by splitting them into smaller parts.
- Resumable: If an upload of a part fails, you can retransmit that part without affecting other parts.
- Parallel Uploads: Parts can be uploaded independently, allowing you to upload multiple parts in parallel to reduce the overall time taken.
Multipart Upload Workflow
- Initiate Multipart Upload: You can initiate a multipart upload from any API Route, Workflow or Function using the File Storage Action. This will initiate the multipart upload and return the url where the separate parts have to be sent to.
- Upload Parts: Upload each part using the upload url returned in the first step and the respective part number. Each part must be between 5 MB and 5 GB in size, except the last part, which can be smaller.
- Complete Multipart Upload: After uploading all parts, complete the multipart upload to assemble the object from the parts.
- Abort Multipart Upload: If you don’t want to finish your multipart upload, you should abort it. Otherwise the parts that have already been uploaded will occupy space in your bucket.
Initiate Multipart Upload
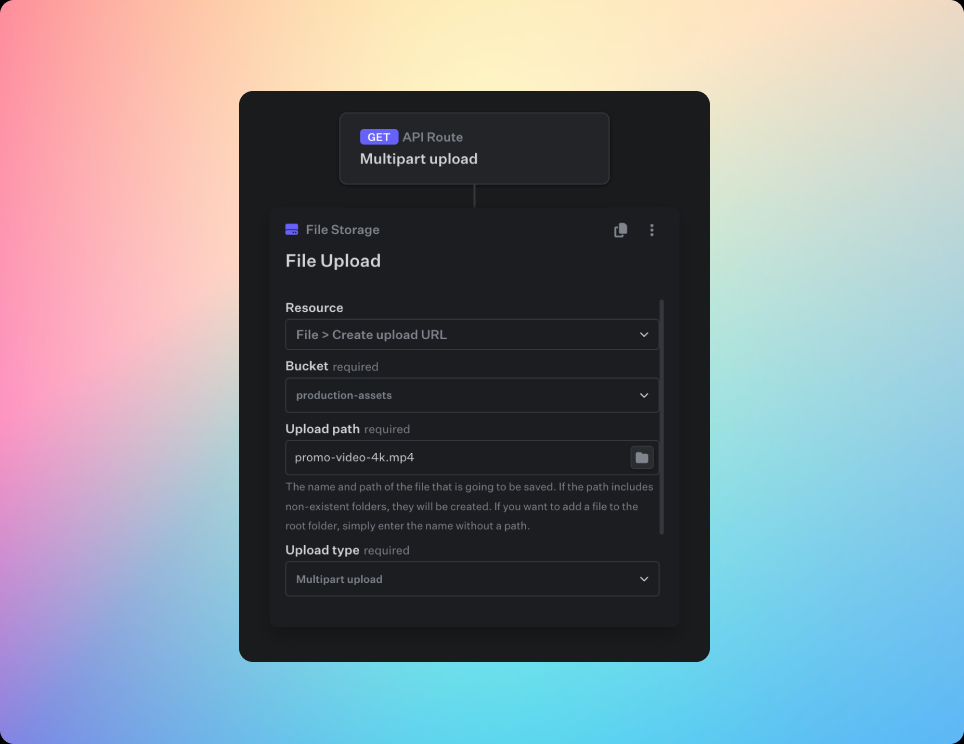
As mentioned above, you can initiate a multipart upload using the File Storage Action via the Upload Url.The
Upload type needs to be set to Multipart upload, otherwise it will create a presigned url for a single-file upload and the multipart upload won’t work.Upload Parts
In order to upload a large file, you first have to divide it into smaller chunks. These chunks are then uploaded separately to the presigned URL that is described in the previous step. This method is efficient for uploading large files, ensuring that if a part fails to upload, only that part needs to be retried. The process involves splitting the file, calculating the number of parts, uploading each part, and gathering necessary metadata for completing the multipart upload.Step-by-Step Instructions
-
Get the File:
The example below uses a simple HTML file input element.
Example:const file = document.getElementById('fileInput').files[0] -
Define Chunk Size:
The chunk size defines the size of each file part to be uploaded.
It needs to be at least 5MB. We recommend a chunk size of 10 MB.
Example:const chunkSize = 10 * 1024 * 1024; // 10 MB -
Define Total Parts:
Determine the total number of parts by dividing the file size by the chunk size and rounding up.
Example:const totalParts = Math.ceil(file.size / chunkSize); -
Initialize an Array to Store Parts Metadata:
Create an array to store the part number and ETag for each uploaded part. These will later be needed for completing the multipart upload -
Loop Over and Slice the File:
Loop through the file, slicing it into chunks based on the chunk size.
Usefile.slice(start, end)to create each chunk. -
Create FormData and Append Chunk and Part ID:
Create a FormData object for each chunk.
Append the chunk and the part ID to the FormData object. -
Send a POST request with the FormData to the presigned URL:
The example below uses the fetch API, but you can use any other method to send the request, such as Axios or XMLHttpRequest.
Theurlthat the request is sent to, is the url that you receive in the Initiate Multipart Upload step. -
Retrieve the ETag from the response headers & update parts array:
Push an object containing thePartNumberandETaginto the parts array. -
Error handling:
The example below uses a simple check if the response was ok and prints the error message to the console.
You can adjust this to your needs and add a custom retry logic if needed.
Complete Multipart Upload
Once all parts are uploaded, the multipart upload process is completed by sending a request with the collected parts metadata to the completion endpoint. Theurl that the request is sent to, is the url that you receive in the Initiate Multipart Upload step.
Abort Multipart Upload
If you need to abort the multipart upload, you can send a DELETE request to the URL. Theurl that the request is sent to, is the url that you receive in the Initiate Multipart Upload step.